Home first aid
Home first aid is a vital set of skills that we should all be familiar with. It represents a collection of procedures and techniques that can be executed to provide initial care to individuals who are injured or ill in a home setting. Home first aid includes swift actions for dealing with wounds, burns, fractures, and sudden health crises such as heart attacks. Additionally, it also involves assisting individuals with chronic health conditions in managing their symptoms and guiding them to the necessary medical care. Home first aid is an important skill set that individuals should learn to ensure the safety and well-being of their families and those around them.
Home first aid is a vital skill set that everyone should learn. It represents readiness to face accidents and emergencies that can happen at any moment within our homes. These incidents can range from minor injuries like cuts and minor burns, to more severe accidents requiring swift and effective intervention. Home first aid is valuable in providing initial care and assisting in reducing the negative effects of injuries and illnesses. These skills play a significant role in preserving the safety and health of family members and loved ones, and they are skills we should acquire and encourage learning to ensure preparedness for any emergency that may arise in the home environment.
Importance of Home First Aid
First aid is a set of initial, potentially life-saving measures given to someone who is injured or becomes suddenly ill before more advanced medical help arrives. It's an essential skill that can make a significant difference in an emergency situation. While many people associate first aid with public spaces, workplaces, or healthcare settings, it's equally important to have a well-equipped and well-prepared first aid kit at home. Here's why the concept of home first aid is crucial:
Immediate Response to Emergencies:
- Accidents and medical emergencies can happen anywhere, including within the confines of your home. Having a home first aid kit readily available ensures that you can provide immediate care to yourself, your family members, or even guests in case of an accident or sudden illness.
Preventing Complications:
- In many cases, providing timely first aid can prevent minor injuries or illnesses from escalating into more severe conditions. For example, treating a minor cut promptly with antiseptic and a bandage can help prevent infection.
Reducing Pain and Discomfort:
- First aid can alleviate pain and discomfort. Simple actions like providing pain relief for headaches or minor injuries can improve the well-being of those affected.
Enhancing Survival Chances:
- In cases of more serious injuries, such as burns, fractures, or cardiac arrest, immediate first aid can significantly increase the chances of survival. CPR (Cardiopulmonary Resuscitation) administered within minutes of a cardiac arrest can double or even triple the chances of survival.
Managing Chronic Conditions:
- Some individuals have chronic health conditions like diabetes, allergies, or asthma. A well-stocked home first aid kit can help in managing these conditions by having the necessary medications and equipment available.
Safety for Children:
- Homes with children are especially prone to accidents. Having a home first aid kit is crucial in ensuring that you can respond effectively and immediately to common childhood accidents like cuts, burns, and falls.
Stabilizing Critical Situations:
- In situations where professional medical help is delayed due to factors like remote location, natural disasters, or emergencies, your home first aid kit can play a vital role in stabilizing critical conditions.
Peace of Mind:
- Knowing that you have a well-organized and equipped home first aid kit can provide a sense of security and peace of mind. This can reduce anxiety in times of emergencies and ensure that you can act swiftly and effectively.
Preparation for Natural Disasters:
- During natural disasters like earthquakes, hurricanes, or floods, professional help may be unavailable for an extended period. In such cases, having a home first aid kit is essential for dealing with injuries or medical issues that may arise.
Promoting Self-Sufficiency:
- Learning first aid skills empowers individuals to take control of their own health and well-being. It encourages self-sufficiency and the ability to assist others in times of need.
home first aid is indispensable for ensuring the safety, health, and well-being of you and your loved ones. It's not just about having a well-stocked first aid kit; it's also about having the knowledge and skills to use it effectively. Taking a first aid course and regularly updating your knowledge is as important as having the right supplies. By doing so, you can become a valuable resource in your home and community, capable of making a difference when it matters most.
Basic First Aid Techniques for Home Emergencies
First aid is a critical skill that everyone should have, especially for dealing with emergencies that can occur at home. From minor injuries to more serious situations, knowing how to apply basic first aid techniques can make a significant difference in the outcome of an emergency. Here are some fundamental first aid techniques for common home emergencies:
-
CPR (Cardiopulmonary Resuscitation):
- Why it's important: CPR is a lifesaving technique used in emergencies such as cardiac arrest or when someone stops breathing. It helps maintain blood circulation and oxygen delivery to vital organs until professional help arrives.
- How to do it:
- Place the heel of one hand on the center of the chest, just below the nipple line.
- Place the other hand on top of the first hand and interlock the fingers.
- Use your upper body weight to push hard and fast, at a rate of about 100-120 compressions per minute.
- After every 30 compressions, give two rescue breaths. Tilt the head back, pinch the nose, and give a breath that makes the chest rise.
-
Heimlich Maneuver (Abdominal Thrusts):
- Why it's important: This technique is used to clear a blocked airway in someone who is choking.
- How to do it:
- Stand behind the person and place your arms around their waist.
- Make a fist with one hand and place the thumb side against the middle of their abdomen, just above the navel.
- Grasp your fist with your other hand and give quick, upward thrusts to force the obstruction out.
-
Treating Cuts and Scrapes:
- Why it's important: Proper wound care can prevent infection and promote healing.
- How to do it:
- Wash your hands thoroughly.
- Clean the wound with mild soap and water.
- Apply an antiseptic and cover the wound with a sterile bandage.
-
Dealing with Burns:
- Why it's important: Burns can range from minor to severe. Immediate first aid can help alleviate pain and prevent complications.
- How to do it:
- For minor burns, run cool (not cold) water over the area for about 10-20 minutes.
- Cover the burn with a sterile dressing or non-stick bandage.
- Seek medical attention for severe burns.
-
Handling Fractures and Sprains:
- Why it's important: Immobilizing the affected area can prevent further injury and reduce pain.
- How to do it:
- For fractures, immobilize the injured area with a splint or bandages.
- For sprains, use the R.I.C.E. method: Rest, Ice, Compression, and Elevation.
-
Allergic Reactions and Anaphylaxis:
- Why it's important: Allergic reactions, especially anaphylaxis, can be life-threatening.
- How to do it:
- Administer an epinephrine auto-injector if available and prescribed.
- Call 911 for immediate medical assistance.
-
Recognizing Heart Attack and Stroke:
- Why it's important: Early recognition can be life-saving in these situations.
- How to do it:
- For heart attacks, recognize common symptoms like chest pain, shortness of breath, and numbness in the arm, and call 911.
- For strokes, use the FAST acronym (Face drooping, Arm weakness, Speech difficulty, Time to call 911).
-
Dealing with Nosebleeds:
- Why it's important: Proper technique can help stop a nosebleed and prevent further discomfort.
- How to do it:
- Pinch the nostrils together and lean forward to prevent blood from flowing down the throat. Apply pressure for 5-10 minutes.
-
Managing Poisoning:
- Why it's important: Quick action can be life-saving in cases of poisoning.
- How to do it:
- Call the poison control center immediately.
- Follow their instructions and provide as much information as possible about the substance ingested.
-
Asthma Attacks:
- Why it's important: Knowing how to help someone having an asthma attack can be crucial in preventing severe respiratory distress.
- How to do it:
- Help the person sit up straight and use their inhaler or prescribed medication.
- If the attack worsens, call for professional medical assistance.
In addition to knowing these basic first aid techniques, it's essential to stay calm in emergency situations, call for professional help when needed, and continually update your knowledge and skills through first aid training and certification courses. Being prepared and knowledgeable in these techniques can make a significant difference in ensuring the safety and well-being of your loved ones in home emergencies.
Building a Home First Aid Kit
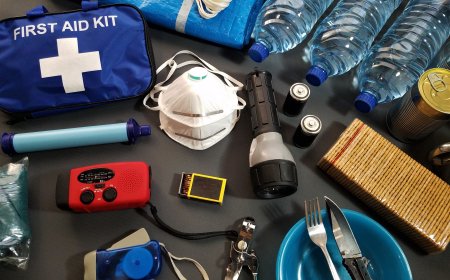
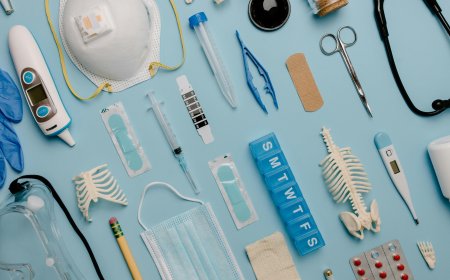
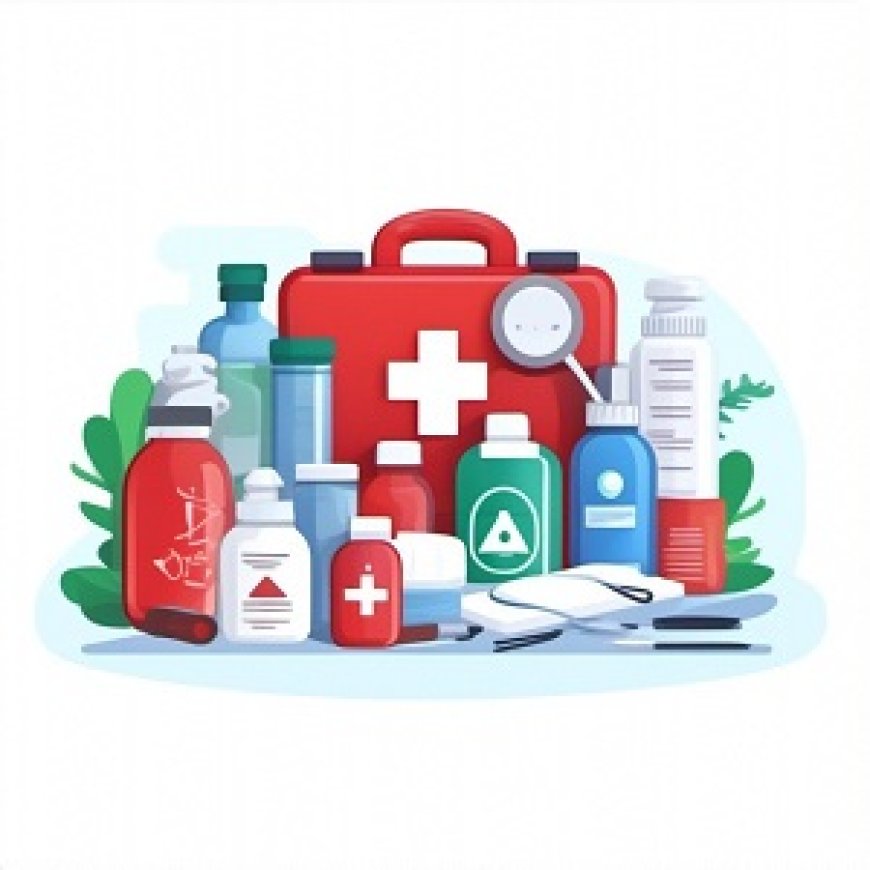
A well-equipped home first aid kit is an essential tool for ensuring the safety and well-being of your family. Accidents and injuries can happen at any time, and having the necessary supplies readily available can make a significant difference in providing timely and effective first aid. Here's how to build a comprehensive home first aid kit, taking into account various categories of supplies:
Container:
- Choose a suitable container: Start by selecting a durable, easy-to-carry container to hold your first aid supplies. A plastic or metal box with a secure latch is a good choice. Make sure it's labeled clearly as a first aid kit.
Basic Supplies: 2. Adhesive Bandages: Various sizes and types of adhesive bandages for covering small wounds and cuts.
- Sterile Gauze Pads and Rolls: These are essential for dressing larger wounds and as a protective layer over burns.
- Adhesive Tape: Medical tape for securing dressings and bandages.
- Scissors: For cutting tape, clothing, and gauze.
- Tweezers: To remove splinters or foreign objects from the skin.
- Digital Thermometer: A digital thermometer to measure body temperature.
- Disposable Gloves: Latex or nitrile gloves for infection control and personal protection.
- Cotton Balls and Swabs: For cleaning wounds and applying ointments.
- Instant Cold Packs: To reduce swelling and soothe minor burns.
- Antiseptic Wipes or Solution: For cleaning wounds to prevent infection.
- CPR Face Shield: An important tool for providing rescue breaths during CPR.
Medications: 13. Pain Relievers: Over-the-counter pain relievers like ibuprofen and acetaminophen.
- Allergy Medication: Antihistamines for treating allergic reactions.
- Prescription Medications: If anyone in your household requires prescription medication regularly, ensure a supply is available.
Specialized Items: 16. EpiPen (if needed): If anyone in your household has severe allergies, keep an epinephrine auto-injector on hand.
- Inhaler (if needed): For individuals with asthma or other respiratory conditions.
- Diabetic Supplies (if needed): Insulin, glucose gel, and a glucometer for diabetics.
- Emergency Blanket: These can help in treating shock or providing warmth during emergencies.
- Burn Cream or Gel: Specifically designed to treat minor burns.
- Eye Wash Solution: For flushing foreign substances from the eyes.
- First Aid Manual: A guide with instructions on providing first aid.
Personal Items: 23. Emergency Contact List: Include important phone numbers for doctors, poison control, and emergency services.
- Medical History and Allergies: Keep a record of family members' medical conditions and allergies.
- Extra Prescriptions and Medical Supplies: Store extra eyeglasses, hearing aids, or any other necessary medical supplies.
Additional Items: 26. Tourniquet (if trained): In case of severe bleeding.
- Trauma Shears: Useful for cutting through clothing to access injuries.
- Multi-Tool: Can be helpful in various emergency situations.
Checklist and Maintenance: 29. First Aid Instruction Manual: Include a first aid manual or instructions on how to use the supplies.
- Regularly Check and Replenish: Inspect your kit regularly and replace any expired or used items.
Location and Accessibility: 31. Accessible Location: Store the kit in a central and easily accessible location in your home.
- Inform Family Members: Make sure everyone in your household knows where the first aid kit is located.
Personalize Your Kit: 33. Consider Family Needs: Customize your kit to suit the specific needs and medical conditions of your family members.
Building a home first aid kit is not a one-time task. It requires regular maintenance and updates to ensure that supplies are in good condition and within their expiration dates. Additionally, it's essential for family members to be familiar with the kit's contents and how to use them effectively in case of emergencies. With a well-prepared and well-maintained home first aid kit, you can be ready to respond promptly and effectively to a wide range of medical situations and accidents that may occur in your home.
CPR and AED Training at Home
Cardiopulmonary Resuscitation (CPR) and Automated External Defibrillator (AED) training is a critical component of first aid. Knowing how to perform CPR and operate an AED can make the difference between life and death in the event of sudden cardiac arrest. While formal training and certification are highly recommended, it's possible to start the learning process at home, and I'll walk you through the steps.
CPR Basics:
CPR is a life-saving technique used in emergencies when someone's heartbeat or breathing has stopped. It involves chest compressions to manually pump blood and rescue breaths to provide oxygen. Here's how you can get started with CPR training at home:
-
Learn the Steps:
- Check for responsiveness: Make sure the victim is unresponsive by tapping and shouting loudly.
- Call for help: Dial emergency services (911 or your local emergency number) or ask someone to do so.
- Start chest compressions: Place your hands in the center of the victim's chest, one on top of the other. Push hard and fast, aiming for a rate of 100-120 compressions per minute. Allow the chest to fully recoil between compressions.
- Give rescue breaths: After 30 chest compressions, give two rescue breaths. Ensure the victim's airway is open and their head is tilted back. Pinch the victim's nose, make a tight seal over their mouth, and breathe into their mouth until you see the chest rise. Repeat this cycle.
-
Use Online Resources: There are many online tutorials and videos available that demonstrate proper CPR techniques. These can be a valuable resource to help you learn and visualize the steps.
AED Training:
AEDs are devices that can analyze a person's heart rhythm and deliver an electric shock to restore a normal heartbeat in the case of sudden cardiac arrest. While using an AED may seem complex, many models are designed for use by laypersons and provide clear, step-by-step instructions. Here's how you can start AED training at home:
-
Get Familiar with the AED: If you have access to an AED, become familiar with its components and instructions. Most AEDs have visual and voice prompts that guide users through the process.
-
Understand AED Placement: AEDs typically have pads that need to be placed on the victim's bare chest. One pad is usually placed on the upper right chest, just below the collarbone, and the other is positioned on the left side of the chest, just below the nipple. Some AEDs are equipped with pediatric pads for use on children.
-
Follow AED Instructions: When you turn on the AED, it will guide you through each step. It will analyze the victim's heart rhythm and determine whether a shock is needed. If a shock is advised, make sure no one is touching the victim, and then press the shock button.
-
Use Online Resources: Many organizations and manufacturers provide online AED training courses and resources. These can help you become more comfortable with the device's operation.
Formal Training:
While it's valuable to start your CPR and AED training at home, formal training is highly recommended. Many organizations, such as the American Heart Association (AHA) and the American Red Cross, offer certified CPR and AED courses. These courses typically include hands-on training with mannequins and AED trainers, allowing you to practice your skills in a controlled environment. Certification is an excellent way to ensure you have the confidence and knowledge to respond effectively in a real emergency.
CPR and AED training at home is a crucial step in preparing for medical emergencies. The ability to perform CPR and use an AED can be life-saving, and starting your training at home is an excellent way to become familiar with these skills. However, formal certification through recognized organizations provides the best training and ensures that you are fully prepared to respond in a real-life situation.
Child Safety and First Aid
Child safety is a paramount concern for parents and caregivers, as children are naturally curious and often engage in activities that may lead to accidents or injuries. To ensure the well-being of children, it's essential to create a safe environment and be prepared to administer first aid when necessary. In this discussion, we'll explore child safety and first aid, focusing on how to keep children safe and respond effectively in the event of accidents or emergencies.
Child Safety Measures:
-
Childproofing: Childproof your home by securing cabinets, outlets, and sharp objects. Use safety gates to block off dangerous areas, such as staircases, and install window guards to prevent falls. Keep small objects and choking hazards out of a child's reach.
-
Supervision: One of the most critical aspects of child safety is constant supervision. Keep a close eye on children, especially when they're playing near water, in the kitchen, or around potentially hazardous substances.
-
Education: Teach children about safety rules and potential dangers. Explain why certain things are off-limits, like matches or household cleaners. Encourage them to ask questions and seek help when needed.
-
Safe Toys and Play Areas: Ensure that toys are age-appropriate and don't have small parts that can be swallowed. Designate safe play areas, both indoors and outdoors, where children can play without risks.
-
Water Safety: Drowning is a leading cause of child deaths. Always supervise children in or near water, whether it's a swimming pool, bathtub, or natural bodies of water. Use flotation devices and teach them how to swim when they're old enough.
Common Child Injuries and First Aid:
Despite your best efforts to keep children safe, accidents can still happen. Here are some common child injuries and the first aid measures to take:
-
Cuts and Scrapes:
- Clean the wound with mild soap and water.
- Apply an antiseptic ointment.
- Cover with a sterile bandage.
-
Burns:
- Run the burned area under cold, running water for at least 10 minutes.
- Cover the burn with a clean, non-stick bandage or plastic wrap.
- Do not use ice or adhesive bandages on burns.
-
Choking:
- If a child is choking but can't cough, talk, or breathe, perform the Heimlich maneuver.
- For an infant, use back blows and chest thrusts instead of the Heimlich maneuver.
-
Poisoning:
- Call poison control immediately (the number should be on your phone or easily accessible).
- Keep any potential poisons out of reach.
- Do not induce vomiting unless directed by a medical professional.
-
Fractures:
- Keep the injured area still and support it with a splint.
- Call for medical help and immobilize the fracture.
First Aid Kit for Children:
A well-prepared first aid kit is crucial for child safety. It should include:
- Bandages, gauze, and adhesive tape.
- Antiseptic wipes or solution.
- Scissors and tweezers.
- Digital thermometer.
- Fever-reducing medication suitable for children.
- Tweezers for removing splinters.
- An emergency contact list.
- A flashlight with extra batteries.
- Disposable gloves.
CPR and AED Training:
Consider taking CPR and AED training, especially if you are a parent or caregiver. Knowing how to perform CPR and use an AED can be life-saving in emergencies. Many organizations offer these courses, and they can give you the confidence and skills to respond effectively to a cardiac arrest situation involving a child.
child safety and first aid go hand in hand to protect children from accidents and injuries. By implementing safety measures, educating children, and being prepared with first aid knowledge and supplies, you can create a safer environment and respond effectively to ensure the well-being of the little ones in your care.
Handling Burns and Scalds in a Home Setting
Burns and scalds are common injuries that can occur in a home setting, especially in the kitchen or bathroom. These injuries can vary in severity, from minor first-degree burns to more severe third-degree burns. Knowing how to provide first aid for burns and scalds is crucial to minimize damage, reduce pain, and prevent complications. In this guide, we will discuss how to handle burns and scalds in a home setting using first aid techniques.
Understanding Burns and Scalds:
-
Burns: Burns are typically caused by dry heat sources, such as flames, hot objects, or direct contact with a hot surface. They are categorized into three degrees of severity:
- First-Degree Burns: These affect only the top layer of skin (the epidermis) and are characterized by redness, mild pain, and swelling.
- Second-Degree Burns: These extend deeper into the skin (the dermis) and may cause blistering, more intense pain, and redness.
- Third-Degree Burns: The most severe, these burns penetrate all skin layers and can result in charred, white, or blackened skin. They may be painless due to nerve damage.
-
Scalds: Scalds are burns caused by contact with hot liquids, steam, or vapors. They can also range from mild to severe, depending on factors like the temperature of the liquid and the duration of contact.
First Aid for Burns and Scalds:
-
Ensure Safety:
- If the burn is the result of a chemical or electrical source, ensure that the source has been eliminated or the person has been safely removed from it.
- Before providing first aid, make sure it's safe for you to approach the injured person without risking your own safety.
-
Cool the Burn or Scald:
- For minor burns and scalds, the first step is to cool the affected area. Hold it under cool running water for at least 10 minutes. This helps to lower the temperature of the skin and stop the burning process.
- Do not use ice or very cold water, as this can further damage the skin.
-
Assess the Severity:
- Determine the degree of the burn or scald. Seek medical attention for second-degree burns or worse, burns on the face, hands, feet, or genitals, or burns caused by chemicals or electricity.
-
Cover the Burn:
- Use a clean, non-stick bandage or plastic wrap to cover the burn. This helps prevent infection and keeps the area sterile.
-
Manage Pain and Swelling:
- Over-the-counter pain relievers like ibuprofen can help reduce pain and inflammation. Follow the dosage instructions.
-
Elevate if Applicable:
- If the burn is on an extremity (arm or leg) and swelling occurs, gently elevate it to reduce swelling.
What to Avoid:
- Do not use adhesive bandages on burns, as they can stick to the injured skin and cause further damage.
- Do not break blisters, as they protect the healing process underneath.
- Do not apply creams, ointments, or ice to the burn, as they can trap heat or cause infection.
When to Seek Medical Attention:
It's essential to recognize when a burn or scald requires professional medical attention. You should seek medical help for the following situations:
- Second-degree burns or worse.
- Burns on the face, hands, feet, genitals, or major joints.
- Burns caused by chemicals, electricity, or explosions.
- If the burn is deep and larger than a 2-inch diameter.
Preventing Burns and Scalds:
The best way to deal with burns and scalds is to prevent them from happening in the first place. Here are some preventive measures:
-
Supervise children: Keep a close eye on children in the kitchen and bathroom, especially when they are near hot surfaces or liquids.
-
Adjust water heater settings: Set your water heater to a safe temperature to avoid scalding accidents. A temperature of 120°F (49°C) is recommended.
-
Use oven mitts and pot holders: When cooking or baking, always use proper protective gear to prevent burns from hot pots and pans.
-
Handle hot liquids with care: Be cautious when handling hot beverages or food, and use lids or spill-proof containers for children.
-
Educate family members: Teach your family about burn and scald prevention and safety measures.
knowing how to provide first aid for burns and scalds is essential for handling common injuries that can occur at home. By following the appropriate first aid steps, you can minimize damage, alleviate pain, and promote the healing process. However, it's crucial to recognize when a burn or scald requires professional medical attention, as severe burns can lead to complications if not treated properly. Preventing these injuries is the best approach, so take safety measures to protect yourself and your loved ones.
Dealing with Choking Incidents at Home
Choking is a life-threatening emergency that can happen in any household, particularly with children, who are prone to putting small objects or food in their mouths. Knowing how to respond to choking incidents at home is crucial for preserving life and preventing serious injury. In this guide, we will discuss how to deal with choking incidents at home using first aid techniques.
Recognizing Choking:
Choking occurs when an object or food becomes lodged in the throat, blocking the airway. Common signs of choking include:
- Sudden inability to speak or breathe.
- Clutching the throat with one or both hands.
- A high-pitched wheezing or no sound at all.
- Bluish skin, especially around the lips and fingertips (in severe cases).
First Aid for Choking:
When someone is choking, immediate action is necessary. The Heimlich maneuver, also known as abdominal thrusts, is a technique to clear the airway. Here's how to perform it:
-
Assess the Situation:
- If the person is coughing forcefully, let them continue coughing to try and clear the obstruction.
- If the person cannot cough, speak, or breathe, act immediately.
-
Stand Behind the Person:
- Position yourself behind the choking person and place one foot slightly in front of the other for balance.
-
Make a Fist:
- Place the thumb side of your fist against the person's abdomen, just above the navel.
-
Grasp with the Other Hand:
- Hold your fist with your other hand and press it into the person's abdomen with a quick, upward thrust. Use enough force to expel the object but not so much as to cause harm.
-
Repeat if Necessary:
- If the person is still choking after the first thrust, repeat the process until the object is dislodged, or until the person becomes unconscious.
If the Person Loses Consciousness:
If the choking person becomes unconscious, start CPR immediately:
-
Lay the Person Down:
- Gently lay the person on their back on a firm surface.
-
Call for Help:
- If you haven't already, call emergency services (911 or your local emergency number).
-
Begin CPR:
- Start chest compressions by placing the heel of one hand on the center of the person's chest (just below the nipple line) and the other hand on top of the first hand. Use your full body weight to compress the chest at least 2 inches deep.
- Perform 30 chest compressions at a rate of 100-120 compressions per minute.
- After the compressions, give two rescue breaths. Tilt the person's head back slightly to open the airway and cover their mouth and nose with yours to create an airtight seal. Give each breath over 1 second and watch for chest rise.
- Continue CPR with a cycle of 30 compressions and 2 rescue breaths until emergency help arrives or the person starts breathing on their own.
Preventing Choking Incidents:
Preventing choking incidents is the best way to deal with them. Here are some preventive measures:
-
Supervise Children: Always supervise young children, especially during meal times, and ensure they do not put small objects or toys in their mouths.
-
Cut Food into Small Pieces: When feeding young children, cut their food into small, manageable pieces to reduce the risk of choking.
-
Teach Proper Chewing: Teach children to chew their food thoroughly before swallowing.
-
Keep Small Objects Out of Reach: Ensure small objects, such as coins, buttons, or small toys, are kept out of reach of young children.
-
Learn First Aid: Everyone in the household, especially caregivers and parents, should be trained in basic first aid, including the Heimlich maneuver and CPR.
knowing how to respond to choking incidents at home is essential because it can be a life-threatening situation that requires immediate action. By recognizing the signs of choking and being prepared to perform the Heimlich maneuver and CPR, you can significantly increase the chances of saving a person's life. Additionally, taking preventive measures, especially with young children, is key to reducing the risk of choking incidents in your home.
Recognizing Signs of Heart Attacks and Strokes
Recognizing the signs of heart attacks and strokes is of paramount importance because these are life-threatening medical emergencies that require immediate intervention. First aid can be a critical factor in minimizing the damage and increasing the chances of a positive outcome. In this guide, we will discuss how to recognize the signs of heart attacks and strokes, emphasizing the role of first aid.
Recognizing Signs of a Heart Attack:
A heart attack, also known as a myocardial infarction, occurs when blood flow to the heart muscle is blocked, typically by a blood clot. Common signs and symptoms of a heart attack include:
-
Chest Pain or Discomfort: This is often described as a feeling of tightness, fullness, pressure, or pain in the chest, which may last for a few minutes or come and go.
-
Pain Radiating to the Arm, Neck, or Jaw: The pain can extend to the left or right arm, neck, jaw, or even the back.
-
Shortness of Breath: The person may experience difficulty breathing or feel as though they can't catch their breath.
-
Nausea or Vomiting: Some individuals may feel nauseous or vomit during a heart attack.
-
Cold Sweat: Profuse sweating, often accompanied by clammy skin, can occur.
-
Lightheadedness or Dizziness: The person may feel dizzy or lightheaded, and some may even faint.
First Aid for a Heart Attack:
If you suspect someone is having a heart attack, follow these steps:
-
Call Emergency Services: Dial 911 or your local emergency number immediately to get professional medical help on the way.
-
Help the Person Sit Down: Have the person sit down in a comfortable position, preferably with their back against a wall or a support.
-
Offer Aspirin If Available: If the person is conscious and not allergic to aspirin, you can offer them a regular, uncoated aspirin to chew slowly. Aspirin can help prevent further blood clot formation.
-
Monitor the Person: Keep a close eye on the person's condition and be prepared to perform CPR if they become unresponsive and stop breathing.
Recognizing Signs of a Stroke:
A stroke occurs when there is a sudden interruption in the blood supply to the brain, leading to brain damage. It can be caused by a blood clot (ischemic stroke) or a ruptured blood vessel (hemorrhagic stroke). Signs and symptoms of a stroke may include:
-
Sudden Numbness or Weakness: This often affects one side of the face, arm, or leg. You may notice a drooping face, slurred speech, or difficulty lifting one arm.
-
Trouble Speaking or Understanding Speech: The person may have difficulty speaking or understanding what others are saying.
-
Sudden Severe Headache: A sudden, severe headache with no apparent cause can be a sign of a stroke.
-
Trouble Walking: The person may experience a sudden loss of balance, coordination, or have difficulty walking.
-
Vision Problems: Blurred or blackened vision in one or both eyes can occur.
First Aid for a Stroke:
Recognizing a stroke quickly is crucial because timely treatment can minimize brain damage. Follow these steps:
-
Act FAST:
- F: Face - Ask the person to smile. Is one side of their face drooping?
- A: Arms - Ask them to raise both arms. Does one arm drift downward?
- S: Speech - Ask them to repeat a simple sentence. Is their speech slurred or strange?
- T: Time - If you observe any of these signs, it's time to call emergency services immediately. Note the time the symptoms started as this can be crucial for treatment decisions.
-
Keep the Person Calm and Comfortable: Ensure the person is in a comfortable position while you wait for medical help. Do not offer them food or drink.
-
Do Not Give Medications: Unlike a heart attack, you should not offer the person aspirin during a stroke as the cause may be hemorrhagic (bleeding).
-
Monitor Their Vital Signs: Keep a close watch on the person's condition and be prepared to perform CPR if they become unresponsive and stop breathing.
recognizing the signs of heart attacks and strokes is critical for providing first aid in a timely manner. Quick action can make a significant difference in the outcome and can even save a person's life. It's important to call for professional medical help immediately when you suspect these medical emergencies and to provide comfort and reassurance to the affected individual while waiting for assistance.
First Aid for Common Home Injuries
Accidents and injuries can happen anywhere, including in the safety of your own home. Knowing how to administer first aid for common home injuries is essential to provide immediate care and potentially prevent complications. In this guide, we'll cover first aid for some of the most typical injuries that can occur at home.
-
Cuts and Scrapes:
- First Aid: Wash your hands and put on disposable gloves, if available. Rinse the wound with clean, running water to remove dirt and debris. Apply gentle pressure with a clean cloth or sterile bandage to control bleeding. If the cut is deep, gaping, or won't stop bleeding after applying pressure for several minutes, consider seeking medical attention. After bleeding stops, apply an antibiotic ointment and cover the wound with a sterile bandage or dressing.
-
Burns:
- First Aid: For minor burns, cool the burn under cold running water for at least 10 minutes. Cover the burn with a sterile, non-stick bandage or plastic wrap. Do not use adhesive bandages directly on the burn. For more severe burns, call 911 and, if possible, elevate the burned area above heart level. Do not use ice or creams on the burn.
-
Sprains and Strains:
- First Aid: Rest, Ice, Compression, and Elevation (R.I.C.E.) is the key for minor sprains and strains. Rest the injured area, apply ice for 15-20 minutes, wrap the area with a compression bandage, and elevate it to reduce swelling. Over-the-counter pain relievers can help with pain and inflammation.
-
Bruises and Contusions:
- First Aid: Apply a cold compress to the injured area to reduce swelling and ease pain. Over-the-counter pain relievers can also help. Elevating the affected area can be beneficial.
-
Nosebleeds:
- First Aid: Have the person sit up and lean forward slightly. Pinch the nostrils together and breathe through the mouth. Apply steady pressure for about 10-15 minutes. If bleeding persists, seek medical attention.
-
Bites and Stings:
- First Aid: Clean the affected area with soap and water. For bee or wasp stings, remove the stinger by scraping it off with a credit card. Apply a cold compress to reduce pain and swelling. Over-the-counter antihistamines and pain relievers can help. For animal or human bites, wash the wound thoroughly and seek immediate medical attention to prevent infection.
-
Choking:
- First Aid: Perform the Heimlich maneuver by standing behind the choking person, placing your hands just above the navel, and delivering upward abdominal thrusts. Continue until the object is expelled or emergency help arrives.
-
Eye Injuries:
- First Aid: For foreign objects in the eye, do not rub the eye. Flush it with clean water for 15 minutes and seek medical attention. For chemical exposures, rinse the eye with cool, clean water for at least 15 minutes and seek immediate medical help.
-
Fractures and Dislocations:
- First Aid: Keep the injured area still and call 911. Support the injury using a splint or bandages to immobilize it until professional medical help arrives.
-
Poisoning:
- First Aid: If someone has ingested poison, call your local poison control center or 911 immediately. Follow their instructions. If chemicals have been spilled on the skin or eyes, rinse with water for at least 15 minutes.
It's essential to note that first aid is not a substitute for professional medical care. For serious injuries or if you're unsure about the severity of the injury, always seek immediate medical attention. Additionally, having a well-stocked first aid kit at home is crucial, and knowing how to use its contents can make a significant difference in providing timely care for common home injuries.
Home First Aid for Allergies and Anaphylaxis
Allergies can range from mild discomfort to severe and life-threatening reactions. Anaphylaxis is a severe allergic reaction that can occur rapidly and requires immediate intervention. Knowing how to administer first aid for allergies and anaphylaxis is crucial, especially when you or a family member has known allergies. In this guide, we'll cover how to provide first aid at home for allergies and anaphylaxis.
Common Allergies:
Before we delve into first aid, let's identify some common allergens that can trigger allergic reactions:
-
Food Allergies: Common triggers include peanuts, tree nuts, shellfish, eggs, milk, soy, and wheat.
-
Insect Stings and Bites: Bee stings, wasp stings, and fire ant bites are frequent culprits.
-
Medications: Some people are allergic to specific drugs, like penicillin or non-steroidal anti-inflammatory drugs (NSAIDs).
-
Pollen: Seasonal allergies to pollen from trees, grasses, and weeds are widespread.
-
Animal Allergens: Pet dander, saliva, or urine can trigger allergic reactions in some individuals.
Signs of Allergic Reactions:
Allergic reactions can manifest differently from person to person, but common signs include:
-
Hives or Rash: Raised, red, itchy welts on the skin.
-
Swelling: Especially of the face, lips, or tongue.
-
Difficulty Breathing: Wheezing, shortness of breath, or a feeling of a swollen throat.
-
Abdominal Pain and Vomiting: Especially in cases of food allergies.
-
Dizziness or Fainting: Due to a drop in blood pressure.
First Aid for Allergic Reactions:
-
Identify the Allergen: Try to identify and remove the allergen if possible. If it's a known allergen and you have an epinephrine auto-injector (EpiPen), administer it according to the instructions. EpiPens are designed for immediate use by individuals with known severe allergies.
-
Call 911: If the allergic reaction is severe or if you don't have access to epinephrine, call 911 or your local emergency number immediately.
-
Provide Comfort and Support: Help the person sit or lie down comfortably, and encourage them to stay calm. Loosen tight clothing and reassure them that help is on the way.
-
Administer Over-the-Counter Antihistamines: If the person has a mild to moderate allergic reaction and you have over-the-counter antihistamines available, you can give them according to the package instructions.
Anaphylaxis:
Anaphylaxis is a severe and potentially life-threatening allergic reaction that can occur within minutes of exposure to an allergen. Signs of anaphylaxis may include:
- Difficulty breathing or wheezing
- Swelling of the face, lips, or tongue
- Rapid or weak pulse
- Severe hives
- Loss of consciousness
First Aid for Anaphylaxis:
Anaphylaxis is a medical emergency that requires immediate action. Here's what to do:
-
Administer Epinephrine: If the person has an epinephrine auto-injector, use it immediately. Follow the instructions provided with the injector.
-
Call 911: Even if epinephrine is administered, call 911 or your local emergency number. Anaphylaxis can be unpredictable, and the person may require further medical intervention.
-
Lay the Person Down: Help the person lie down on their back and raise their legs if possible. This can improve blood flow.
-
Monitor Vital Signs: Keep an eye on their breathing and pulse. Be prepared to perform CPR if they become unresponsive and stop breathing.
-
Stay Calm and Reassure: Provide emotional support and keep the person as calm as possible.
Remember that allergies and anaphylaxis can be life-threatening, so it's crucial to act quickly and seek professional medical help. Always follow the instructions of healthcare providers and, if applicable, carry and know how to use an epinephrine auto-injector for severe allergies. A well-prepared and equipped home can make a significant difference in managing allergic reactions and anaphylaxis.
In conclusion
home first aid comes as essential skills that we must possess. The ability to provide initial care in a home environment enhances safety and instills confidence in dealing with everyday accidents and potential emergencies. Understanding how to respond to injuries and illnesses correctly can minimize harm and contribute to a quicker recovery. Therefore, we should encourage the learning of these skills and their sharing among family members and the community. Redirecting efforts toward promoting home first aid helps in building safer communities and preparedness for health challenges.
What's Your Reaction?


