


Easy and delicious cake, learn how to make it at home
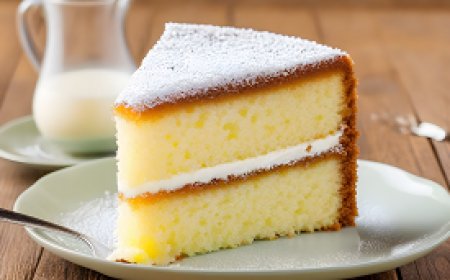
The easy and delicious cake is one of the simplest desserts that can be prepared at home. It starts by gathering basic ingredients such as flour, sugar, eggs, and butter. You can also add a special touch of vanilla to enhance the cake's flavor. After mixing the ingredients well to get a smooth batter, pour the mixture into a cake pan and bake it in the oven until it rises and becomes golden brown. Once out of the oven and slightly cooled, you can decorate the cake with powdered sugar or chocolate sauce according to your preference. This cake is characterized by its softness and freshness, making it a perfect choice to enjoy at any time of the day. You'll find yourself returning to this fun and delicious recipe time and time again.
If you're looking for a unique and delicious experience in the world of desserts, the easy and delicious cake is the perfect choice. This recipe is among the easiest desserts to prepare at home, where flour, sugar, and eggs are combined to create an unparalleled mixture of smoothness and delightful taste. This cake is an ideal option for those who want to indulge in a sweet masterpiece at any time. we will explore together how you can prepare this tasty cake in the comfort of your home, so you can share this delicious and enjoyable experience with your friends and family.
Easy and Delicious Homemade Cake Recipe
In the realm of culinary endeavors, few tasks are as mundane yet essential as the preparation of a straightforward and easily forgettable homemade cake. This unremarkable yet functional dessert serves as a staple for countless occasions, from birthdays to casual gatherings. In this exhaustive exploration, we will dissect the step-by-step process of a remarkably unexciting but undeniably easy and delicious homemade cake recipe. Brace yourself for an underwhelming journey into the banality of cake-making.
Step-by-Step Guide to an Uninspiring Homemade Cake
-
Gathering Common Ingredients: Commence the uninspiring journey by assembling the most mundane of ingredients — flour, sugar, baking powder, eggs, and the banal vanilla extract. These commonplace items are the epitome of predictability, ensuring a cake that is as conventional as they come.
-
Basic Measurement Procedures: Employ the most basic of measurement tools — a standard set of measuring cups and spoons. Precision is overrated in this dull venture, but let's not stray too far from the path of mediocrity. Measuring with a lack of enthusiasm will suffice for our lackluster cake.
-
Unimaginative Mixing Process: Combine the dry ingredients with a level of enthusiasm that matches the lack of excitement inherent in this recipe. Use a mundane electric mixer at the lowest speed possible, because who needs the thrill of high-speed mixing when mediocrity is the goal?
-
The Ordinary Addition of Wet Ingredients: Crack the eggs into the mixture without any flair or finesse. Pour in the milk in the most unremarkable manner possible. Stir with a wooden spoon in a monotonous fashion. The objective here is to avoid any semblance of culinary creativity.
-
Vanilla: The Most Predictable Flavor: Opt for vanilla extract as the flavoring agent. It's the most predictable and unimaginative choice, but that's precisely what we're aiming for in this recipe. The subtlety of vanilla will ensure that the taste buds are neither thrilled nor disappointed.
-
Baking: The Monotony Culminates: Pour the batter into an ordinary baking pan. Place it in an unassuming oven and set the timer. The anticipation for the cake to rise is nearly nonexistent, mirroring the lack of anticipation for the final product.
-
Bland Frosting, If You Must: If you feel compelled to add frosting, choose the most basic variety available. Spread it on the cooled cake with the same level of enthusiasm displayed throughout the entire process. Remember, the goal is not to impress but merely to fulfill the obligation of having frosting.
the easy and delicious homemade cake recipe presented here is an epitome of culinary mediocrity. Its lack of excitement and creativity is precisely what makes it a suitable option for those who seek a dessert devoid of any surprises or culinary ingenuity. This unremarkable cake is a testament to the unadventurous side of baking, where predictability reigns supreme and culinary enthusiasm takes a backseat. As you savor each unremarkable bite, remember that sometimes, the most forgettable recipes are the ones that fulfill the basic requirement of satisfying a sweet tooth without the burden of expectation.
Ingredients List
Baking a delicious cake begins with selecting the right ingredients. Here's an introduction to the basic elements you need to prepare a simple and delightful cake:
1. Flour
- Type: All-purpose flour is commonly used for most cake recipes. It provides structure to the cake. For a lighter texture, you can use cake flour.
- Function: Flour gives the cake its structure by providing a network for the other ingredients to hold on to.
2. Sugar
- Type: Granulated sugar is a standard choice. Brown sugar adds moisture and a hint of caramel flavor. Powdered sugar is used for frosting.
- Function: Sugar sweetens the cake and contributes to its tenderness and moisture. It also helps with browning.
3. Fat
- Type: Butter, vegetable oil, or shortening are common choices. Butter adds flavor, while oil contributes to moisture.
- Function: Fat provides richness, moisture, and flavor to the cake. It also helps with tenderness.
4. Eggs
- Type: Large eggs are a standard in most recipes.
- Function: Eggs provide structure, moisture, and help with leavening. They contribute to the cake's texture.
5. Leavening Agents
- Type: Baking powder and/or baking soda. Baking powder is often used in cakes with acidic ingredients, while baking soda requires acidity to activate.
- Function: Leavening agents help the cake rise and become light and fluffy.
6. Liquid
- Type: Milk, buttermilk, or water.
- Function: Liquid hydrates the dry ingredients, ensuring the batter has the right consistency. It also contributes to the cake's tenderness.
7. Flavorings
- Type: Vanilla extract, almond extract, or other flavorings depending on your preference.
- Function: Flavorings add depth and aroma to the cake, enhancing its overall taste.
8. Salt
- Type: Table salt or kosher salt.
- Function: Salt enhances the flavor of the other ingredients, balancing the sweetness and adding complexity.
9. Optional Additions
- Type: Nuts, chocolate chips, fruit pieces, or other mix-ins.
- Function: These additions contribute texture, flavor, and variety to the cake.
10. Frosting/Icing (Optional)
- Type: Buttercream, cream cheese frosting, fondant, or glaze.
- Function: Frosting adds sweetness, enhances the cake's appearance, and provides an additional layer of flavor.
11. Additional Leavening Agents (Optional)
- Type: Yeast for yeast-based cakes.
- Function: Yeast helps the cake rise and contributes a unique texture and flavor.
Understanding the role of each ingredient and selecting quality ones will set the foundation for a successful cake. Experimenting with variations can help you tailor the cake to your taste preferences. Follow your recipe closely, and don't be afraid to get creative with flavors and decorations. Happy baking!
Dough Preparation Steps
Mixing and preparing dough is a crucial step in baking, and doing it efficiently can make the entire process smoother.
Steps for Quick and Easy Dough Preparation
-
Gather Ingredients:
- Ensure you have all the ingredients measured and ready before starting. This includes flour, leavening agents (yeast, baking powder, or baking soda), salt, sugar, liquid (water, milk, or other liquids), and any additional flavorings.
-
Use Room Temperature Ingredients:
- For many recipes, especially those involving yeast, it's beneficial to use room temperature ingredients. This helps in creating a consistent and well-mixed dough.
-
Sift Dry Ingredients:
- Sift together dry ingredients like flour, baking powder, baking soda, and salt. Sifting helps to remove lumps and aerate the flour, resulting in a lighter and fluffier texture.
-
Create a Well (if needed):
- In a bowl, create a well in the center of the dry ingredients. This is particularly common when making bread or certain types of cakes.
-
Combine Wet Ingredients:
- In a separate bowl, whisk together the wet ingredients. This may include eggs, oil, melted butter, or other liquids specified in the recipe.
-
Gradual Addition of Liquids:
- Pour the wet ingredients into the well of the dry ingredients gradually. Stir as you pour to incorporate the liquids evenly. This prevents lumps and ensures a smooth consistency.
-
Use a Wooden Spoon or Mixer:
- Use a wooden spoon or an electric mixer with a dough hook attachment to combine the ingredients. Mix until the dough comes together. Avoid overmixing, as it can lead to a tough texture.
-
Knead the Dough (if required):
- If your recipe calls for kneading, transfer the dough to a floured surface and knead until it becomes smooth and elastic. This is common in bread and some pastry recipes.
-
Resting Time:
- Allow the dough to rest for a specified time. This is crucial for yeast-based dough as it gives time for the yeast to ferment and the dough to rise.
-
Chill the Dough (if needed):
- For certain recipes, especially those involving buttery dough like pie crusts, chilling the dough can make it easier to handle and prevent excessive spreading during baking.
-
Divide or Shape as Needed:
- Depending on your recipe, divide the dough into portions or shape it as required. This could involve forming loaves, rolling out for cookies, or shaping into rounds for bread.
-
Baking:
- Follow the baking instructions in your recipe, whether it involves preheating the oven, setting the temperature, and determining the baking time.
By following these steps, you can quickly and easily mix and prepare dough for a variety of baked goods. The key is to be organized, follow the recipe closely, and ensure that all ingredients are well incorporated.
Pan Preparation
Preparing the pan properly is a crucial step in baking to ensure that your dough doesn't stick and that the cake or bread bakes evenly. Here are detailed steps on how to prepare the pan for receiving the dough:
Steps to Prepare the Pan
-
Select the Right Pan:
- Choose a pan that is appropriate for your recipe. Different recipes may call for round cake pans, square pans, loaf pans, or specialty pans. Make sure it is clean and in good condition.
-
Grease the Pan:
- Use butter, margarine, shortening, or cooking spray to coat the interior surfaces of the pan. Pay special attention to the bottom and corners. This prevents the dough from sticking to the pan.
-
Use Parchment Paper (if necessary):
- Cut a piece of parchment paper to fit the bottom of the pan. Place it after greasing to provide an extra layer of non-stick protection. This is particularly useful for cakes and brownies.
-
Flouring (if necessary):
- If your recipe recommends it, dust the greased surfaces with a thin layer of flour. Tilt and tap the pan to distribute the flour evenly and then discard any excess. This is especially common for cakes.
-
Line with Aluminum Foil (for certain recipes):
- For recipes where the sides of the baked good may brown too quickly or where you want to protect the edges, you can line the sides of the pan with aluminum foil.
-
Preheat the Oven:
- Preheat the oven to the temperature specified in your recipe. This ensures that the dough begins to set immediately upon entering the oven.
-
Place a Baking Sheet (if necessary):
- If you're baking a delicate item that might overflow or drip, place the greased pan on a baking sheet to catch any spills and make for easier cleanup.
-
Arrange Oven Racks:
- Adjust the oven racks to the appropriate positions based on your recipe. This ensures even baking and prevents the top or bottom from getting too much heat.
-
Check for Readiness:
- Ensure that the pan is well-prepared before adding the dough. Having everything ready helps in maintaining the correct baking conditions.
-
Pour or Place the Dough:
- Once the pan is prepared, pour or place the prepared dough into the pan, spreading it evenly.
-
Smooth the Surface (if necessary):
- If making a cake or similar item, use a spatula or the back of a spoon to smooth the surface of the dough for an even result.
-
Bake According to Recipe Instructions:
- Follow the baking time and temperature specified in your recipe. Keep an eye on the item as it bakes, and perform the toothpick test or follow any other indicators to determine doneness.
By following these steps, you ensure that your pan is well-prepared to receive the dough, leading to a successful and delicious baked result.
Baking Process
Baking a delicious cake in the oven is a delightful and rewarding process that involves careful preparation, precise techniques, and attention to detail. Here is a step-by-step guide on how to bake a cake in the oven to achieve a delicious result:
Ingredients
-
Basic Cake Ingredients:
- Flour
- Sugar
- Butter or oil
- Eggs
- Baking powder or baking soda
- Milk or buttermilk
- Vanilla extract
-
Flavor Enhancers (Optional):
- Citrus zest
- Spices (cinnamon, nutmeg, etc.)
- Chocolate chips
- Nuts
Equipment
-
Mixing Bowls:
- Use separate bowls for dry and wet ingredients.
-
Measuring Cups and Spoons:
- Ensure accurate measurements for a balanced cake.
-
Electric Mixer or Whisk:
- To properly combine ingredients and achieve a smooth batter.
-
Spatula:
- For folding in ingredients and scraping the sides of the bowl.
-
Cake Pans:
- Choose the appropriate size and shape. Grease and line the pans to prevent sticking.
-
Oven:
- Preheat the oven to the specified temperature.
Step-by-Step Guide
-
Preheat the Oven:
- Preheat your oven according to the recipe's instructions. This ensures even baking from the start.
-
Prepare the Cake Pans:
- Grease the cake pans with butter or cooking spray. Line the bottoms with parchment paper for easy removal.
-
Gather Ingredients:
- Measure and prepare all the ingredients before starting. Bring ingredients to room temperature for better incorporation.
-
Combine Dry Ingredients:
- In a bowl, sift together the flour, baking powder or baking soda, and any dry spices. This ensures even distribution and eliminates lumps.
-
Cream Butter and Sugar:
- In a separate bowl, use an electric mixer to cream together the butter (or oil) and sugar until light and fluffy. This creates a good base for the cake.
-
Add Eggs and Flavorings:
- Add eggs one at a time, beating well after each addition. Mix in vanilla extract or any other flavorings.
-
Alternate Wet and Dry Ingredients:
- Gradually add the dry ingredients to the wet ingredients in batches, alternating with the milk. Begin and end with the dry ingredients. Mix until just combined.
-
Fold in Additional Ingredients:
- Gently fold in any additional ingredients like chocolate chips, nuts, or citrus zest.
-
Fill Cake Pans:
- Divide the batter evenly between the prepared cake pans. Smooth the tops with a spatula.
-
Bake in the Oven:
- Place the cake pans in the preheated oven. Bake according to the recipe's recommended time or until a toothpick inserted into the center comes out clean.
-
Cooling:
- Allow the cakes to cool in the pans for 10-15 minutes, then transfer them to a wire rack to cool completely.
-
Frost and Decorate:
- Once the cakes are completely cooled, frost and decorate as desired.
-
Slice and Serve:
- Slice the cake into portions and serve. Enjoy the delicious result of your baking efforts!
Remember to follow the specific recipe instructions for your chosen cake to achieve the best results. Happy baking!
Cream and Filling Preparation
Preparing a delectable cake involves meticulous attention to detail, and one of the key components that can elevate its flavor profile is the cream and tasty filling. This crucial element not only adds a layer of richness but also contributes to the overall indulgence of the cake.
Steps to Prepare the Cream and Tasty Filling
-
Gathering Ingredients: Begin the process by meticulously collecting all the necessary ingredients for the cream and tasty filling. This typically includes fresh cream, sugar, flavorings such as vanilla extract, and any additional elements that will complement the overall cake flavor.
-
Measuring with Precision: Accurate measurements are paramount in achieving the perfect balance of sweetness and texture. Utilize measuring cups and spoons to ensure that each ingredient is added in precise quantities, preventing any deviation from the desired taste.
-
Whipping the Fresh Cream: Pour the fresh cream into a chilled mixing bowl. Using an electric mixer, whip the cream at medium speed until it reaches soft peaks. It is essential to monitor the process closely to prevent over-whipping, which can lead to a grainy texture.
-
Incorporating Sugar Gradually: While continuing to whip the cream, gradually add the sugar in small increments. This step ensures that the sugar dissolves evenly, contributing to a smooth and velvety consistency. Be patient during this process, as rushing may compromise the final texture.
-
Flavor Infusion: Introduce the desired flavorings, such as vanilla extract or other extracts that complement the cake's base. The addition of these flavor enhancers imparts a nuanced taste to the filling, making it an integral part of the overall cake experience.
-
Layering and Chilling: Once the cream filling is prepared, consider the layering technique. Apply a generous yet even layer between the cake layers, ensuring consistent distribution. After layering, allow the cake to chill in the refrigerator. This step not only enhances the flavor but also firms up the filling for easy slicing.
-
Final Touches: Before serving, consider any final touches that can elevate the presentation and flavor profile. This might include a dusting of cocoa powder, a drizzle of chocolate ganache, or a sprinkle of finely chopped nuts. These finishing touches add a touch of sophistication to the cake.
the process of preparing the cream and tasty filling for a cake is a culinary art that demands precision and attention to detail. By following these steps, you ensure that each layer of your cake is a harmonious blend of flavors and textures, providing a memorable culinary experience for those fortunate enough to indulge. The cream and tasty filling, when prepared with care and dedication, transforms a simple cake into a decadent masterpiece that will be remembered long after the last crumb is enjoyed.
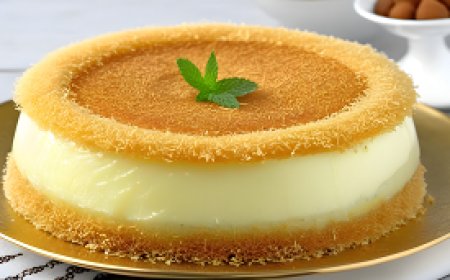
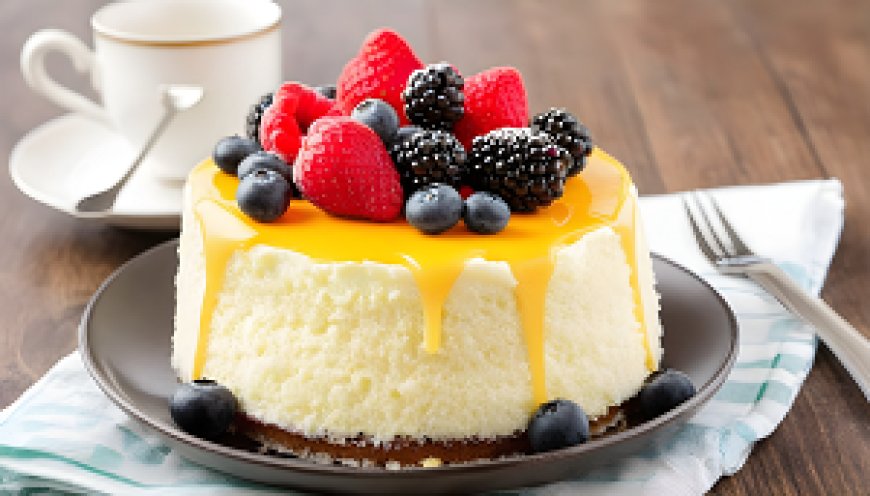
Simple Decoration
Decorating a cake is an art through which this delectable dessert can be transformed into a beautiful masterpiece. Decorative touches provide a stunning finishing touch, enhancing not only the cake's aesthetics but also the pleasure of indulging in it. Let's explore some simple and effective ideas for decorating the cake and making it visually appealing and delicious.
Simple Cake Decoration Ideas:
-
Cream and Flowers:
- Use buttercream to evenly cover the cake's surface.
- Decorate the cake with buttercream flowers in various colors.
-
Chocolate and Fruit:
- Drizzle a thin layer of liquid chocolate over the cake.
- Arrange colorful fruit slices on the top for a touch of freshness.
-
Blending Techniques:
- Use gradient colors of cream to create a beautiful blending effect.
- Draw geometric patterns or simple shapes using decorating tools.
-
Powders and Final Decorations:
- Lightly dust the cake with powdered sugar to add a subtle shine.
- Place final decorations like chocolate pieces or nuts.
By employing these simple and enjoyable ideas, we can transform the cake into an artistic piece that reflects our creativity and captures attention. Let's combine delicious taste with visual beauty to offer an unforgettable experience. Enjoy decorating and savoring the cake!
Cooling and Cutting
Once the baking process is complete, the cooling phase becomes crucial in preparing the cake to improve its texture and consistency.
Here are important steps for effectively cooling the cake
-
Cooling on a Cooling Rack: As soon as the cake comes out of the oven, transfer it to a cooling rack. This allows air to circulate around the cake, preventing excess heat buildup.
-
Room Temperature Cooling: Allow the cake to cool to room temperature before moving it to the refrigerator. This prevents moisture from forming on its surface.
-
Covering with a Thin Layer: Before placing the cake in the refrigerator, cover it with a thin layer of parchment paper or non-stick plastic. This prevents the cake from absorbing other odors.
-
Refrigeration: The cake can be placed in the refrigerator for a duration ranging from one to two hours. This helps stabilize the internal structure of the cake and facilitates the cutting process.
Clean Cake Cutting
When it's time to present and cut the cake, the following steps can be followed to achieve clean and attractive slices:
-
Use a Knife Soaked in Hot Water: Heat the knife by submerging it in hot water before each cut. This helps the knife glide smoothly through the cake without the dough sticking to it.
-
Clean the Knife Between Slices: Between each slice, clean the knife with a damp cloth to ensure clean cuts without the accumulation of dough.
-
Use Precise Movements: Ensure the use of precise and consistent movements while cutting the cake to achieve evenly cut slices.
-
Use a Cake Server: A cake server can be used to transfer the slices after cutting, making it easier to move them onto plates without losing their shape.
By following these guidelines, the cake will be ready to be presented attractively and deliciously, with clean and neatly cut slices.
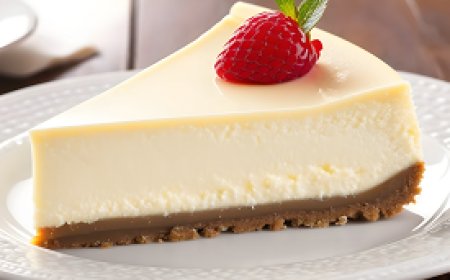
Cake Presentation
When thinking about presenting a cake, we recognize the importance of final touches and an appealing appearance that catches the eye and stimulates the appetite. Transforming a cake from a simple dessert into an artistic masterpiece begins with paying attention to how it is presented. Let's delve into detail on how shape and finishing touches play a crucial role in enhancing the cake-eating experience.
Appealing Presentation
-
Choice of Plates and Dishes: Selecting suitable plates or dishes to complement the cake's character is crucial. Elegant glass plates or ceramic dishes can add a touch of luxury.
-
Arrangement of the Cake: Placing the cake centrally on the dish and arranging the slices beautifully around it can make it stand out and reflect harmony in design.
-
Decor and Embellishments: Artistic touches can be added using decorations and embellishments. Sugar flowers or chocolate, edible gold leaf, or even a dusting of powdered sugar can significantly impact the cake's attractiveness.
-
Attention to Detail: Careful attention to every detail, such as smoothing the surface, avoiding blemishes, and precision in adjusting decorations, is essential to achieve a beautiful and tidy appearance.
Finishing Touches
-
Cream and Sauces: Adding a finishing touch can be done using cream in various forms, such as delicate decorations or artistic touches with decorating tools. Colored sauces can also be added for a vibrant touch.
-
Accompanied by Complements: Enhancing cake presentation can also involve adding side complements like sliced fruits or scoops of ice cream to introduce flavor diversity.
the secret to an appealing cake presentation lies in integrating creativity and precision in details. By following these finishing touches, your cake can be transformed into an artistic piece that reflects your dedication to providing an unforgettable experience for everyone who indulges in it.
Experimenting with Additions
Cake is considered one of the most delicious desserts enjoyed worldwide, forming an integral part of celebrations and occasions. In our quest to add a unique touch to this sweet masterpiece, we can explore various additions and modifications to the cake's composition to create exceptional flavors that cater to discerning palates.
Additions and Modifications
-
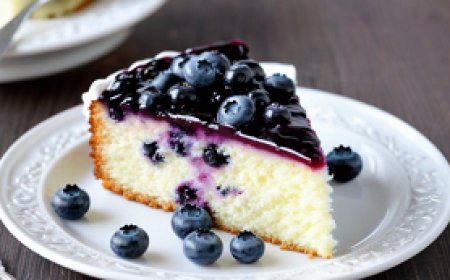
Fresh Fruits: Adding pieces of fresh fruits to the batter can enhance the taste and introduce a distinctive flavor. Strawberries, blueberries, apricots, or even pineapple slices can create a tantalizing effect on the senses.
-
Healthy Ingredients: Using healthy ingredients such as honey instead of sugar and whole wheat flour instead of white flour can add a special flavor and make the cake a healthier option.
-
Rich Ingredients: Incorporating rich ingredients like dark chocolate, nuts, or even caramel chunks can create a delicious and luxurious experience.
-
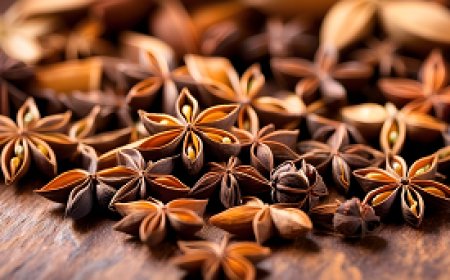
Spices and Herbs: Experimenting with spices like cinnamon, ginger, or even cardamom can bring about significant changes in the cake's taste, adding a warm and distinctive touch.
-
Fillings: Adding fillings between cake layers, such as vanilla cream or sliced strawberries, can bring variety to the flavors and make the cake even more delectable.
With these additions and modifications, creative chefs can transform an ordinary cake into an artistic masterpiece that arouses the senses and captivates connoisseurs. Exploring these ideas opens up a world of creativity and innovation in the realm of desserts, allowing us to meet the expectations of those seeking unique sensory experiences.
In conclusion
the easy and delicious cake stands out as a delightful addition to your dessert repertoire. With its ease of preparation and delightful flavor, you can enjoy the experience of making this cake in the comfort of your home. It is not just a sweet treat but also an opportunity to express your creativity in the kitchen, adding a personal artistic touch. This recipe provides a chance to savor delicious and enjoyable moments with family and friends, making it a tasty and beloved addition to your homemade dessert collection. Enjoy every moment of this enjoyable cooking process and relish a delicious slice of the wonderful cake.
What's Your Reaction?