A moist and delicious cheesecake in simple steps
A moist and delicious cheesecake is a delectable addition to the world of desserts, and what makes it even more enticing is that it can be prepared with simple steps at home. It begins by creating a crumbly base of ground biscuits with butter, followed by mixing a smooth cream cheese blend with sugar and eggs, adding a touch of vanilla to enhance the flavor. The mixture is poured over the biscuit base and baked in the oven until set. After cooling, the cheesecake can be adorned with a layer of fruit or chocolate sauce, adding a touch of allure to this delightful treat. With its rich flavor and velvety texture, cheesecake stands as a perfect choice for those craving a delicious and easily prepared dessert.
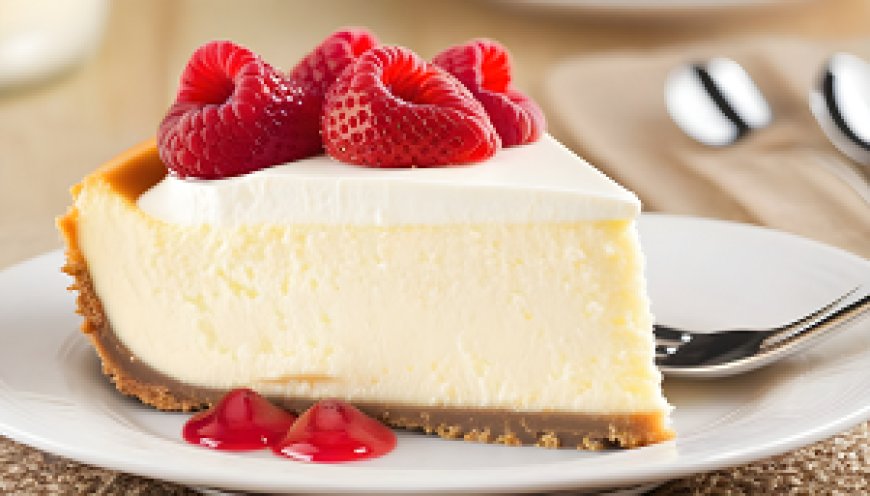
In the world of desserts, moist and delicious cheesecake stands out as one of the unique recipes that can be easily prepared in the comfort of home. This cake is characterized by a perfect balance between its soft texture and rich flavor, making it a beloved choice among dessert enthusiasts. What adds to its allure is the simplicity of the steps that can be followed to achieve outstanding results. The journey of crafting this delightful cheesecake begins with creating a crumbly and tasty base, followed by easy steps to mix the creamy filling ingredients. Subsequently, the cake is baked until it achieves its delightful moist texture. Let's explore together how this recipe can add a touch of magic to your kitchen, delighting your senses with an unparalleled dessert experience.
Preparing the Cheesecake Base
Preparing a cheesecake base is an art that requires precision and attention to detail to ensure delightful flavor and the perfect texture. In this guide, we will together learn easy and effective steps to prepare the cheesecake base the right way. Follow these steps carefully and achieve a delicious cheesecake that surpasses your expectations.
Ingredients:
- 2 cups (200 grams) of crisp biscuits (butter or graham crackers can be used)
- 1/2 cup (120 grams) melted butter
Preparation Steps:
1. Grinding the Biscuits:
- Place the biscuits in a plastic bag and use a pestle or rolling pin to grind them until smooth. You can also use a food processor for this step.
2. Adding the Butter:
- Pour the ground biscuits into a bowl, then add the melted butter.
- Use a wooden spoon to mix the ground biscuits with the butter until you get a homogeneous mixture.
3. Arranging the Base:
- Pour the mixture into the used cake base, then use the old cup base or a glass base to press the biscuits evenly.
- Smooth the surface with a spoon or the cup base to get an even and compact base.
4. Chilling:
- Place the biscuit base in the refrigerator for at least 30 minutes to allow the butter to solidify and the base to set.
5. Preparing the Filling:
- In the meantime, prepare the cheesecake filling with your favorite ingredients. You may need cream cheese, sugar, eggs, and vanilla.
6. Pouring the Filling:
- Once the base is cooled, pour the cheesecake filling over the chilled base.
7. Baking the Cake:
- Preheat the oven to 325 degrees Fahrenheit (160 degrees Celsius), then bake the cake for 45 to 60 minutes or until the cake sets in the middle.
8. Cooling and Decorating:
- Once the cake is baked, let it cool in the oven for a while before transferring it to the refrigerator for complete cooling.
- After cooling, you can decorate the surface with fruits, chocolate sauce, or any additional toppings you prefer.
Now, thanks to the precision and care in executing these steps, you can enjoy a delicious and delightful cheesecake. Make sure to follow the steps accurately for the best result, and feel free to customize the recipe according to your personal preferences. Bon appétit!
Creating the Delicious Filling
Preparing the delicious filling for a cheesecake is a culinary moment where different flavors come together to create an unforgettable experience. In this detailed guide, we will explore how to prepare a tasty filling for cheesecake, step by step, to achieve the perfect balance between smoothness and rich flavor.
Ingredients
- 3 blocks of cream cheese (vanilla), room temperature
- 1 cup sugar
- 1 teaspoon vanilla extract
- 3 eggs, room temperature
- 1/2 cup natural yogurt
- 2 tablespoons flour
- A pinch of salt
Preparation Steps
1. Preheating the Oven
- Before starting to prepare the filling, preheat the oven to 325 degrees Fahrenheit (160 degrees Celsius) to ensure it is ready for baking.
2. Beating the Cream Cheese
- In a large bowl, use an electric mixer or a hand beater to beat the cream cheese until smooth and creamy.
3. Adding Sugar
- Gradually add sugar to the cream cheese and continue beating until sugar granules are dissolved, and the mixture becomes smooth.
4. Adding Vanilla
- Add vanilla extract and continue beating until fully blended, enhancing the wonderful flavor.
5. Adding Eggs
- Add eggs one at a time, continuously beating, to achieve a smooth and homogeneous mixture.
6. Adding Yogurt and Flour
- Add yogurt and continue beating, then add flour and a pinch of salt. Beat until all ingredients are well combined.
7. Pouring the Filling over the Base
- Pour the delicious cheesecake filling over the pre-prepared chilled base, ensuring even distribution.
8. Baking
- Place the cake in the preheated oven and let it bake for 45 to 60 minutes or until it sets in the middle.
9. Cooling
- Once baked, allow the cheesecake to cool to room temperature, then refrigerate for complete cooling.
Now, thanks to these meticulous steps, you'll have a wonderful cheesecake with a delicious filling. Follow the recipe carefully and be sure to enjoy this delightful experience. You can serve it with chocolate sauce or fruits to add an extra touch of pleasure. Enjoy an unforgettable dessert!
Mixing and Kneading Steps
When preparing any baking recipe, the mixing and kneading stage holds special importance, as the homogeneity and interaction between ingredients form the foundation for achieving a perfect end result. In this detailed guide, we will delve into the steps of mixing and kneading to ensure you create a consistent and successful dough each time.
Mixing and Kneading Steps
1. Ingredient Preparation
- Before starting, measure and prepare all ingredients, allowing them to reach room temperature for optimal results.
2. Dry Mixing
- In a large bowl, combine dry ingredients such as flour, salt, and baking powder if required. Use a wooden spoon to ensure even distribution.
3. Wet Mixing
- In another bowl, mix wet ingredients like eggs, oil, and milk. Use a hand mixer or an electric blender on low speed.
4. Combining Ingredients
- Add the wet ingredients to the dry ones, gently mixing with a wooden spoon until the ingredients are well incorporated. Avoid overmixing to prevent excess kneading.
5. Kneading
- Transfer the dough onto a floured, round surface and begin the kneading process. Fold the dough towards you and use the heel of your hand to push it away.
6. Resting
- Place the kneaded dough in a bowl, cover it with plastic wrap, and let it rest for 30 to 60 minutes, allowing it to double in size.
7. Second Knead (Optional)
- After resting, you may choose to knead the dough again to ensure even gas distribution and a smooth structure.
8. Shaping
- Shape the dough according to the recipe's requirements, whether it's for bread, pizza, or other types of dough.
9. Final Rest
- After shaping, let the dough rest again for a short period to achieve an optimal final structure.
10. Proofing or Baking
- Follow the specific steps in your baking recipe to determine the proofing or baking time needed.
As a fundamental process in baking, proper mixing and kneading are crucial for success. Enjoy preparing your dough with precision, and be sure to follow the recipe carefully to ensure fantastic results every time.
Main Baking Steps
Baking is both an art and a science, requiring a delicate balance of ingredients and techniques. Successful baking involves meticulous steps to achieve a delicious and perfectly textured result.
Key Steps of Baking
1. Measuring Ingredients
- Before starting, accurately measure all ingredients using measuring cups and a kitchen scale.
2. Mixing and Kneading
- Follow the mixing and kneading steps carefully to achieve a smooth and elastic dough.
3. First Proofing
- Place the dough in a bowl and let it proof for at least an hour or until it doubles in size.
4. First Shaping
- After proofing, shape the dough according to the desired form, such as forming a loaf.
5. Second Proofing
- Allow the shaped dough to proof again after shaping to enhance its flavor and structure.
6. Preheating
- Preheat the oven to the temperature specified in the baking recipe.
7. Baking
- Place the dough in the preheated oven and bake until it turns golden brown and releases a pleasant aroma.
8. Cooling
- Once baked, let it cool on a cooling rack to set the structure and improve the taste.
9. Slicing and Serving
- Slice the bread after complete cooling and serve according to your preferences.
By following these key steps meticulously, you'll enjoy an excellent baking experience. Don't forget the importance of timing and precision at each stage to achieve delicious and delightful bread. Enjoy your journey into the art of baking!
Cheesecake Decoration
Decorating a cheesecake is an artistic touch that adds beauty and allure to this delicious dessert. The choice of decoration style and ingredients can define the look and taste of the cheesecake in an unparalleled way.
Steps for Decorating a Cheesecake
1. Cooling the Cheesecake
- Before starting the decorating process, ensure that the cheesecake has been fully cooled. It may be beneficial to leave it in the refrigerator for a while to achieve a more refreshing texture.
2. Making Decorating Cream
- Use soft cream cheese and whip it well until it becomes smooth and homogeneous. You can add powdered sugar and vanilla according to your preference.
3. Spreading the Decorating Cream
- Transfer the decorating cream to the top center of the cheesecake using a spoon or a spreading tool. You can smooth the surface for an even distribution.
4. Decorating with Fresh Fruit
- Add a refreshing touch by using fresh fruits on the surface of the cheesecake. You can use strawberries, blueberries, or kiwi slices according to your choice.
5. Decorating with Chocolate
- A touch of beauty and indulgence can be added by placing chocolate shavings or flakes. You can also artistically drizzle chocolate sauce.
6. Using Mint or Flowers
- An elegant final touch can be added using fresh mint leaves or edible non-toxic flowers to decorate the edges.
7. Final Chilling
- After decorating, it's advisable to let the cheesecake chill in the refrigerator for some time to allow the decorations to set.
Decorating a cheesecake is a fun and creative step. By choosing the right elements and employing the correct techniques, you'll transform a delicious cheesecake into an artistic masterpiece that pleases both the eye and the palate. Enjoy the creative experience and savor the wonderful flavors!
Presentation Tips
When it comes to food presentation, the visual aspect plays a crucial role in enhancing the dining experience. By presenting food attractively, you can stimulate appetite and increase the enjoyment of the meal. In this guide, we will detail some effective tips for presenting food in a perfect manner.
Tips for Food Presentation
1. Choose Suitable Plates and Utensils
- Select dishes and utensils appropriate for the type of food you are serving. The right colors and shapes can add an aesthetic touch to the table.
2. Arrangement and Coordination
- Arrange the foods attractively on the table, considering organized layering for a beautiful and coordinated look.
3. Pay Attention to Details
- Pay attention to small details, such as placing mint leaves or fresh herbs on the foods to add a touch of elegance and color.
4. Embrace Layered Presentation
- Presenting food in layers adds dimension and variety to the table, whether for desserts or salads.
5. Artistic Use of Sauces
- Pouring sauce artistically on the food adds extra allure. You can use presentation tools to create distinctive patterns.
6. Care for Beverage Presentation
- Don't forget to present beverages in a style that complements the food. Use beautiful glasses and garnish drinks to enhance their appearance.
7. Dedication to the Final Touch
- Add refined finishing touches using additional garnishes such as nuts or chocolate flakes for a unique final touch.
Presenting food beautifully enhances not only the visual appeal but also the overall dining experience. Follow these tips to transform your meal into an unforgettable and inspiring event. Enjoy presenting and savoring your food with elegance!
Storage and Shelf Life
When it comes to food storage, understanding how to preserve freshness and quality for an extended period is crucial. Proper food storage not only contributes to saving time and money but also enhances food safety.
Food Storage and Duration
1. Storing Vegetables and Fruits
- Store vegetables and fruits in cool, humid places, such as refrigerator drawers, to maintain their freshness. Avoid storing certain fruits, like bananas and watermelon, in the refrigerator.
2. Storing Meat and Fish
- Store meat and fish in the lower part of the refrigerator, placing them in freezer-specific bags to prevent odor leakage. Maintain the freezer temperature at -18 degrees Celsius (0 degrees Fahrenheit).
3. Storing Dairy Products
- Store dairy products in cool, humid places, like the refrigerator door. Avoid storing milk in the door to prevent temperature fluctuations.
4. Storing Canned Goods and Grains
- Store canned goods in a cool, dry place, and check the expiration dates. Keep grains in airtight containers to avoid moisture and insects.
5. Storing Cooked Foods
- Store cooked food in sealed containers and place them in the refrigerator. Maintain the temperature inside the refrigerator to prevent bacterial growth.
6. Inspection and Discarding
- Regularly inspect food and check expiration dates. Discard any food that has spoiled to ensure the safety of the remaining food.
Proper food storage plays a vital role in maintaining our nutritional safety. By following these tips and guidelines, we can improve the quality of food and ensure our enjoyment of it for a longer duration.
Suggestions for Recipe Updates
Updating a recipe is an essential step to add new flavors and enhance the cooking experience. Regardless of your level of expertise in the kitchen, simple modifications to the recipe can elevate both the taste and nutritional value.
Suggestions for Updating the Recipe
1. Ingredient Substitutions
- Experiment with substituting some ingredients with alternatives to add new flavors. For example, use honey instead of sugar or replace butter with coconut oil.
2. Adding Extra Spices
- Experiment with adding new spices or herbs to enhance the flavor. You can try a blend of dried herbs like thyme and basil.
3. Updating the Cooking Method
- Refresh the cooking process, such as changing from grilling to baking or transitioning to steam cooking. This can lead to a new experience and distinctive results.
4. Adjusting Ingredient Ratios
- Experiment with adjusting ingredient ratios to achieve a different balance in taste, such as increasing the amount of spices or reducing the sugar content.
5. Adding Extra Ingredients
- Try adding new ingredients, such as toasted nuts or dried fruits, to introduce additional texture and flavor.
6. Updating Dish Presentation
- Enhance the dish presentation by decorating it in a new style. Use beautiful plates and creative presentation to make the dish more appealing.
Updating a recipe can completely transform your kitchen experience. By using these suggestions, you'll discover new horizons of flavors and creativity in cooking. Enjoy the experiment and be ready to savor a new taste!
Sharing and Enjoying
Sharing moments and enjoying them form the foundation of our life experiences. Whether through social gatherings, engaging in activities, or even exchanging ideas and stories, a sense of belonging is fostered, enriching our lives with joy.
Enhancing the Experience of Sharing and Enjoyment
1. Embrace the Present Moment
- Be present in every moment and try to enjoy the current moment without dwelling on future matters. Awareness of the moment enhances effective enjoyment.
2. Directing Attention
- Direct your attention to the small details around you. Listen to the sounds, observe things closely, and savor the scents. This enhances awareness and makes the experience more enriching.
3. Share Joy
- Share joy with others. Exchange positive experiences and smiles. Joy is a metal that shines brighter when shared.
4. Discover New Activities
- Challenge yourself to try new activities. Discovering new hobbies or skills can be a great opportunity for sharing and enjoyment.
5. Social Interaction
- Enhance interaction with others. Make conversations positive and try to understand others' perspectives. Effective communication enhances enjoyment of social relationships.
6. Inspire Others
- Be a source of inspiration for others and share your positive experiences. Positive influence can be a motivator for everyone to improve their lives.
Sharing moments and enjoying them makes life brighter and more fulfilling. Considering every moment as an opportunity for sharing and enjoyment, we make our journey in this life more textured with happiness and positive impact.
In conclusion
the moist and delicious cheesecake stands as an unparalleled choice to satisfy dessert cravings in an easy and delightful manner. Thanks to the simple steps, you can now enjoy preparing this renowned cake in the comfort of your home without any hassle. Its perfect balance between creamy flavor and moist texture offers a dessert experience like no other. As you savor each bite of this delectable treat, the moist and delicious cheesecake remains a symbol of simplicity and pleasure in the realm of local desserts. It's not just a dessert; it's an unforgettable experience to share with loved ones, adding a touch of magic to your dining moments.
What's Your Reaction?


